

Hey there, fellow riders and DIY enthusiasts! I'm a supplier of high - quality flashers, and today I'm gonna walk you through the process of installing a heavy - duty flasher. Whether you're looking to upgrade your motorcycle's signaling system or just need to replace a faulty flasher, this guide is for you.
First things first, let's talk about why you might want a heavy - duty flasher. A heavy - duty flasher is designed to handle more electrical load than a standard one. This is crucial if you've added extra lights or upgraded your turn signals to high - wattage bulbs. It ensures that your turn signals blink at the correct rate, which is not only important for safety but also for compliance with traffic regulations.
Tools and Materials You'll Need
Before you start the installation, gather the following tools and materials:
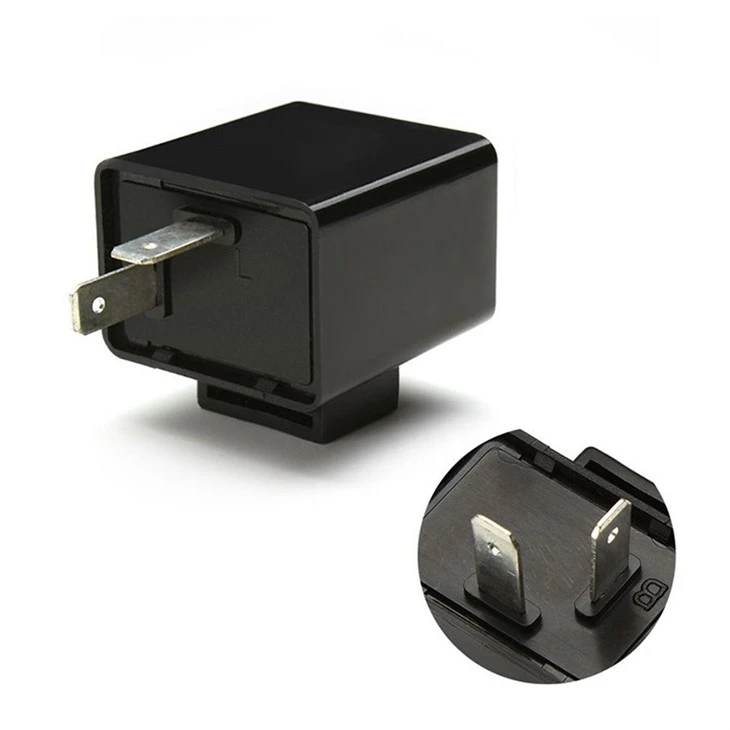
- A heavy - duty flasher (we've got a great selection, including the Motorcycle Silent Hazard Blinker, Motorcycle Silent Turn Signal Relay, and Universal 12V Turn Signal Relay).
- A socket wrench set
- Electrical tape
- A wire stripper
- A multimeter (optional but very useful for troubleshooting)
Step 1: Locate the Old Flasher
The first step in installing a new heavy - duty flasher is to find the old one. On most motorcycles, the flasher is located under the seat, near the battery, or in the wiring harness under the fairing. It's usually a small, rectangular or cylindrical device with wires connected to it.
To access the flasher, you may need to remove some parts of your motorcycle. For example, if it's under the seat, you'll need to remove the seat using a socket wrench. Be careful not to lose any screws or bolts.
Step 2: Disconnect the Battery
Before you start working on the electrical system, it's crucial to disconnect the battery. This will prevent any short circuits or electrical shocks. Use a socket wrench to loosen the negative terminal of the battery and remove the cable.
Step 3: Remove the Old Flasher
Once you've located the old flasher and disconnected the battery, it's time to remove the old flasher. Most flashers are connected to the wiring harness with a plug - in connector. Simply pull the connector apart to disconnect the flasher.
If your flasher is wired directly to the harness, you'll need to use a wire stripper to remove the insulation from the wires and then disconnect them. Make sure to remember which wire goes where. You can use a piece of tape to label the wires if needed.
Step 4: Inspect the Wiring
While the old flasher is out, take a moment to inspect the wiring. Look for any signs of damage, such as frayed wires, loose connections, or corrosion. If you find any issues, repair or replace the damaged parts before installing the new flasher.
Step 5: Install the New Heavy - Duty Flasher
Now it's time to install the new heavy - duty flasher. If your new flasher has a plug - in connector, simply plug it into the wiring harness. Make sure the connection is secure.
If your new flasher is wired directly, use a wire stripper to strip the ends of the wires on the flasher and the wiring harness. Then, connect the wires together, matching the colors if possible. Use electrical tape to wrap the connections and prevent any short circuits.
Step 6: Reconnect the Battery
Once the new flasher is installed, it's time to reconnect the battery. Use a socket wrench to tighten the negative terminal of the battery and reattach the cable.
Step 7: Test the Turn Signals
Before you put everything back together, test the turn signals to make sure the new flasher is working properly. Turn on the ignition and activate the turn signals. The turn signals should blink at a steady rate. If they don't, there may be an issue with the installation or the flasher itself.
If the turn signals are blinking too fast or too slow, it could be a sign that the flasher is not compatible with your motorcycle's electrical system. In this case, you may need to try a different flasher.
Step 8: Put Everything Back Together
If the turn signals are working properly, it's time to put everything back together. Replace any parts you removed, such as the seat or fairing, using a socket wrench. Make sure all the screws and bolts are tightened.

Troubleshooting Tips
- No Blinking: If the turn signals don't blink at all, check the connections to the flasher. Make sure they are secure and there are no loose wires. You can also use a multimeter to check if there is power going to the flasher.
- Fast Blinking: Fast blinking usually indicates that the flasher is not rated for the electrical load of your turn signals. Try a heavier - duty flasher.
- Slow Blinking: Slow blinking can be caused by a weak battery or a problem with the wiring. Check the battery voltage with a multimeter and inspect the wiring for any issues.
Why Choose Our Flashers
As a flasher supplier, we take pride in offering high - quality products. Our flashers are designed to be reliable, durable, and compatible with a wide range of motorcycles. Whether you're a casual rider or a professional mechanic, you can trust our products to get the job done.
If you're interested in purchasing a heavy - duty flasher or have any questions about our products, feel free to reach out. We're here to help you find the right flasher for your needs and provide you with excellent customer service.
In conclusion, installing a heavy - duty flasher is a relatively simple process that can greatly improve the safety and functionality of your motorcycle's turn signals. By following these steps and using our high - quality flashers, you'll be back on the road with reliable signaling in no time.
References
- Motorcycle repair manuals
- Electrical wiring diagrams
So, what are you waiting for? Contact us today to start your procurement process and get the best heavy - duty flasher for your motorcycle!


